Unlock IoT Control: Remote IoT Web SSH Server On Windows 10
Are you ready to unlock the full potential of your IoT devices from anywhere in the world? Mastering a remote IoT web SSH server on Windows 10 is not just a valuable skill; it's a gateway to enhanced control, security, and efficiency in managing your connected devices.
This guide delves into the intricacies of setting up a robust and secure remote SSH server on Windows 10, empowering you to manage your IoT devices with ease and confidence. From the fundamentals of SSH to the practical steps of configuration and optimization, we will explore the tools and techniques needed to establish a seamless remote access experience. Our journey will cover everything from enabling SSH and configuring your IoT devices to the critical steps of port forwarding and server security.
Let's face it, the modern world runs on interconnected devices. Whether it's smart home appliances, industrial sensors, or embedded systems, the ability to remotely access and manage these devices is no longer a luxury, but a necessity. The remote IoT web SSH server on Windows 10 provides a powerful, secure method to do just that. It allows you to control and monitor your devices from virtually anywhere, while keeping everything secure. This guide is your key to unlocking this capability.
- Decoding Palang Tod Meaning Series More Your Guide
- Erome Sophie Rain Erotic Photos Videos Explore Now
Before we dive into the technical aspects, let's understand what SSH actually is. SSH, or Secure Shell, is a cryptographic network protocol operating for secure data communication, remote command-line login, command execution, and other secure network services between two networked computers. It's the backbone of secure remote access, and its benefits in the context of IoT management are numerous.
So, what are the advantages of this setup? For starters, it allows you to remotely access and control your IoT devices. Need to troubleshoot a server issue while you're away from the office? Want to access files from a remote location? This is where the remote IoT web SSH server on Windows 10 truly shines, serving as a reliable companion for IT professionals and hobbyists alike. Plus, you can manage your devices remotely while keeping everything secure. And it all starts with setting up the SSH client on your Windows 10 machine.
Many people wonder about the security aspects. The core advantage of using SSH is secure communication. By using encryption, it protects data transmitted between your computer and the remote server. This is absolutely critical, especially when dealing with IoT devices that might be handling sensitive data or interacting with critical systems. A properly configured SSH server adds a strong layer of protection against unauthorized access and potential cyber threats. As the demand for secure remote access grows, having a reliable SSH server is essential, especially given the rise of IoT devices.
- Desiremovies Alternatives Watch Hindi South Indian Movies Online
- Loral Infallible Concealer Full Coverage Waterproof Find Out
Before we can get to the remote access part, we need to get the SSH client enabled on your Windows 10 machine. It's the first step in the journey, and, luckily, the process is straightforward. After the ssh client is installed, now you can start the work. Let's enable the SSH client in Windows 10.
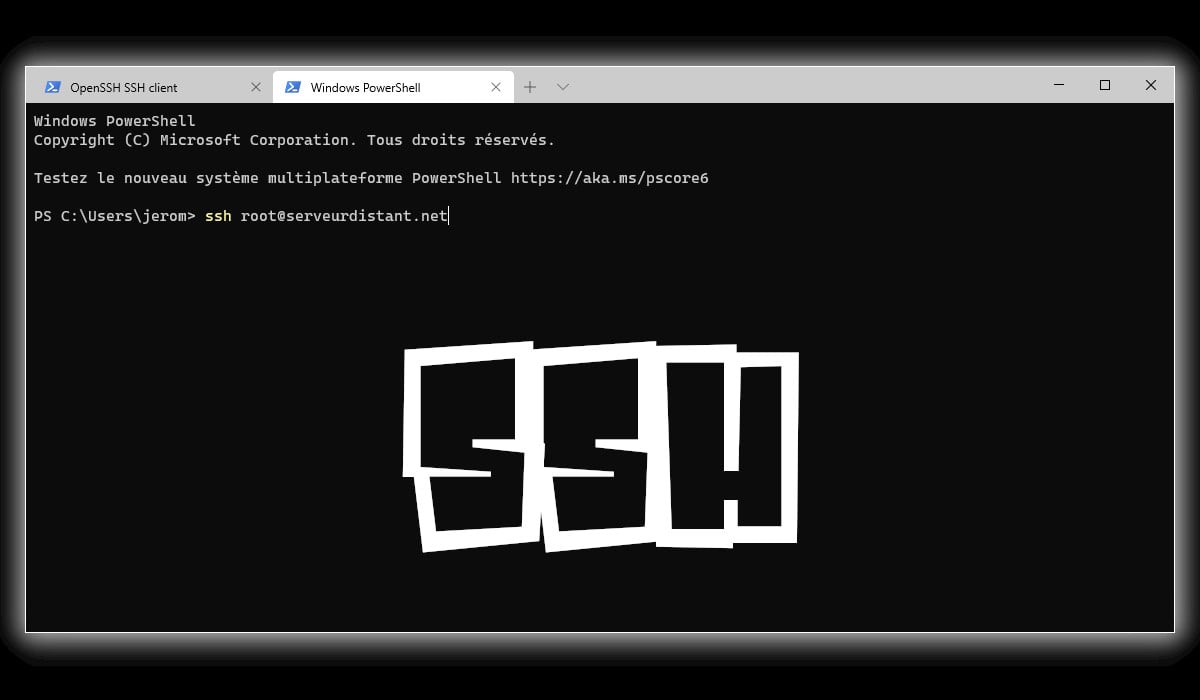
Configuring SSH on Windows 10 means enabling the SSH client. Open the Start menu and go to Settings. From Settings, go to Apps, and then to Optional Features. Click on "Add a feature", and then search for OpenSSH Client. Install it. Once it's installed, you're ready to start using SSH from your command prompt or PowerShell.
Now that we have the basics covered, let's look at how to manage your IoT devices from anywhere. Setting up a remote IoT web SSH server on Windows 10 is an essential skill for modern IT professionals and hobbyists alike. The process involves several steps, from enabling the SSH client to configuring your IoT devices and setting up port forwarding. The remote IoT web SSH server on Windows 10 offers a seamless way to control and monitor IoT devices from virtually anywhere. A proper configuration will allow you to efficiently monitor and manage your devices, troubleshoot issues, and make necessary adjustments to ensure they function optimally.
Once you've enabled the SSH client, the next step is often configuring your IoT devices. This can vary depending on the specific devices you're using, but it generally involves ensuring that the devices are accessible on your network and that they're configured to accept SSH connections. The exact process will vary, but most IoT devices support SSH.
With the SSH client enabled and your IoT devices ready, the next crucial step is port forwarding. Port forwarding allows you to access your devices from outside your local network. Think of it as creating a tunnel through your router to access your devices. Setting up port forwarding often involves logging into your router's configuration panel and creating a rule that forwards traffic on a specific port (usually port 22 for SSH) to the IP address of your Windows 10 machine.
The final piece of the puzzle is securing your server. This is absolutely critical. Securing your SSH server involves several steps, including using strong passwords or, even better, SSH keys, enabling firewall rules to restrict access, and keeping your system updated with the latest security patches. A secure server will protect you from unauthorized access. There are many other things you can do to secure your server, but these are some of the most important things to keep in mind.
Once you've configured and secured your SSH server, the world is your oyster. You can manage your IoT devices from virtually anywhere in the world. The remote IoT web SSH server on Windows 10 is an increasingly popular solution for managing remote devices securely over the internet. Windows has offered a native SSH client and integrated SSH tools since the Windows 10 version. These tools, combined with a web interface, can make managing your devices easy.
One interesting option to consider is using a web-based SSH client like Shellinabox, or the use of HTML5 based interface like Guacamole. Thanks to HTML5, once Guacamole is installed on a server, all you need to access your desktops is a web browser.
Several third-party solutions like Bitvise SSH Server are also available. Bitvise SSH Server is an SSH, SFTP, and SCP server for Windows. It is robust, easy to install, easy to use, and works well with a variety of SSH clients, including Bitvise SSH Client, OpenSSH, and PuTTY. These are great options if you need more features or a more user-friendly interface.
When you use SSH to connect to a remote server, a graphical SFTP browser will automatically pop up in order to directly edit your remote files. Your remote applications will also display seamlessly on your Windows desktop using the embedded X server.
To recap, here's a quick summary of how to activate Windows 10 SSH: Open Settings > Apps > Optional Features > Add a feature > search OpenSSH Client and install it.
Ultimately, the journey to mastering a remote IoT web SSH server on Windows 10 is a rewarding one. It's a powerful way to manage your IoT devices remotely while keeping everything secure, offering you a robust and efficient way to manage and control your connected devices from virtually anywhere.
Here's a table with key features and benefits:
| Feature | Benefit |
|---|---|
| Remote Access | Control and monitor IoT devices from any location with an internet connection. |
| Secure Communication | Utilizes SSH encryption to protect data transmitted between your device and the server. |
| Management Capabilities | Manage devices, troubleshoot issues, and make necessary adjustments. |
| File Transfer | Securely transfer files to and from your IoT devices. |
| Port Forwarding | Allows you to access devices from outside your local network. |
| Versatile Clients | Works with various SSH clients like OpenSSH, PuTTY, and Bitvise SSH Client. |
| Web-Based Access | Options like Shellinabox and Guacamole offer browser-based access. |
To install OpenSSH server on Windows, follow these steps: Open Settings > Apps > Optional Features > Add a feature > search OpenSSH Server and install it. Remember, the OpenSSH server feature can be installed on Windows 10 and 11.
Detail Author:
- Name : Werner Wiza
- Username : tre72
- Email : lilliana61@gmail.com
- Birthdate : 1985-12-31
- Address : 13765 Koelpin Club Apt. 582 Libbiemouth, OH 97226
- Phone : +1-352-976-2187
- Company : Beatty, Funk and Schaden
- Job : Cost Estimator
- Bio : Alias ut asperiores quod impedit est ducimus saepe. Non ea expedita voluptas veritatis atque. Quo aperiam est ut ut.
Socials
tiktok:
- url : https://tiktok.com/@wilma.kling
- username : wilma.kling
- bio : Labore enim ea debitis nulla et qui voluptatem. Minus aut corporis at.
- followers : 3993
- following : 923
instagram:
- url : https://instagram.com/klingw
- username : klingw
- bio : Quas fuga ut consequatur ipsa sunt. Iusto et omnis ut nihil.
- followers : 318
- following : 2742
facebook:
- url : https://facebook.com/wilma.kling
- username : wilma.kling
- bio : Illum sed id quod est officia. Velit aut ea quo a consequatur.
- followers : 6001
- following : 2329
twitter:
- url : https://twitter.com/wilmakling
- username : wilmakling
- bio : Et sunt voluptatum quia dolore voluptates et aut. Tenetur ad occaecati fugiat quis ratione officia.
- followers : 729
- following : 2754
linkedin:
- url : https://linkedin.com/in/wilmakling
- username : wilmakling
- bio : Sit voluptatem vel nostrum eos dolorem.
- followers : 4547
- following : 2803
